Configuring the Connections
Prior to configuring the source and destinations connections in DataSync, you need the following:
- A version of Sage 300 People supported by Sage
- A destination database (preferably, in the same collation as your Sage 300 People Database)
- A valid version of DataSync (refer to Installing DataSyncfor more information)
Configuring the Source Connection(s)
You need to create source connections that will be used for refreshing the data (for tables that can be loaded incrementally).
To create the source connection:
- In DataSync, create a new source connection.
- In the list, select Custom API.
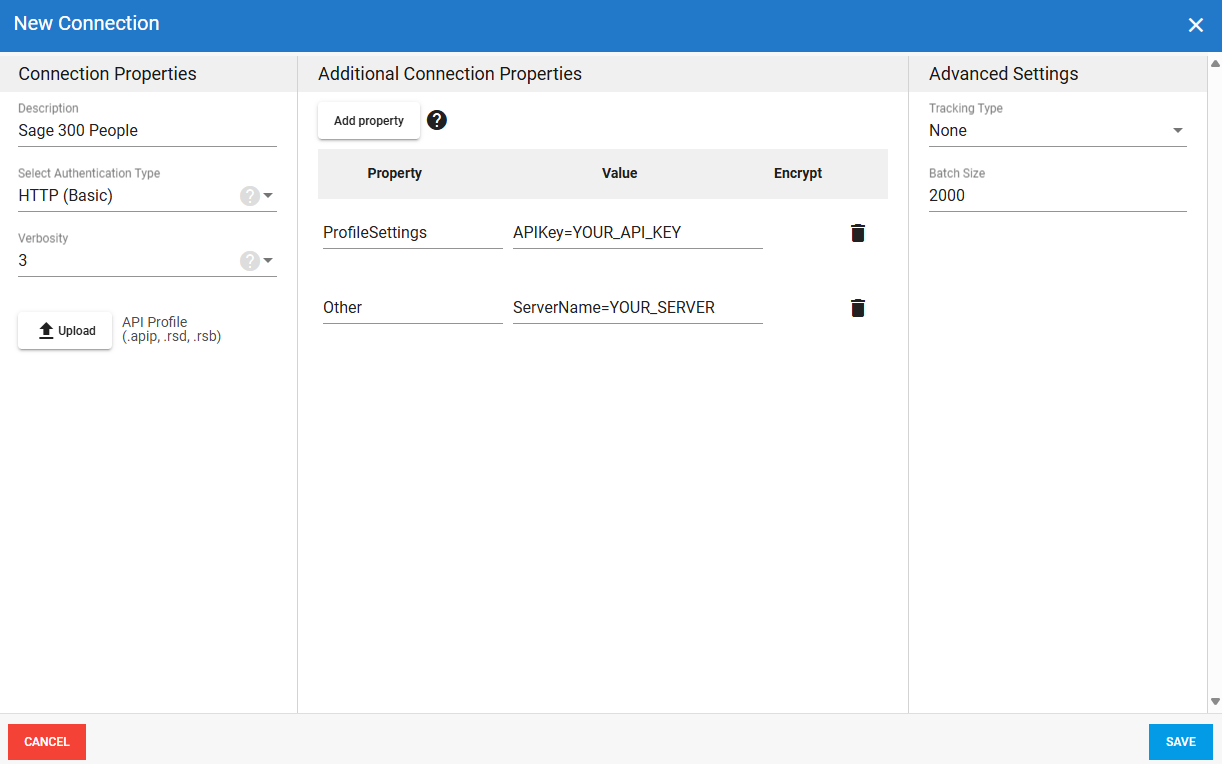
- In the Connection Properties panel:
- In the Description field, enter a name for this connection.
- In the Select Authentification Type field, select HTTP (Basic).
- Upload the following APIP file: CONN_202X.0.X.XXX_Sage 300 People No Refresh.apip
-
In the Additional Settings panel, click Add property and select Encrypted.
In Property, enter ProfileSettings.
In Value, enter APIKey=YOUR_API_KEY
-
Click a second time on Add property and select Visible.
In Property, enter Other.
In Value, enter ServerName=YOUR_SERVER
-
Click Save.
Configuring the Destination Connection
You need to create a destination connection for the Sage 300 People Data Warehouse. This connection will receive data from the source connection(s).
To create the Data Warehouse destination connection:
- In DataSync, create a new destination connection.
-
Depending on your installation scenario, perform one of the following actions:
-
If you will be replicating data from a data warehouse, select SQL Server or Oracle, depending on where the Nectari data warehouse is located.
-
-
In the Connection Properties panel:
-
In the Description field, enter Data Warehouse as the name for this connection.
-
Enter the name of the server on which the database is installed.
-
Enter the name of the database to connect to.
-
Enter the user name and password.
-
-
Click Save.
